
仕事やプライベートでメールをよく利用する場合、動作が遅い・メール振り分けが面倒・設定や使い方が難しい…なんてストレスに感じる事ってありませんか?
今回は仕事効率化に貢献してくれるメールクライアントThunderbirdのインストールから設定までをご紹介していきます。
Thunderbirdにはより効率化できるアドオンもたくさんありますのでかなりおすすめですよ。
Warning: include(/home/w-clue/howto-recordingmedia.com/public_html/wp-content/themes/cocoon-master/inc/single_top_ad.php): Failed to open stream: No such file or directory in /home/w-clue/howto-recordingmedia.com/public_html/wp-content/themes/cocoon-child-master/functions.php on line 15
Warning: include(): Failed opening '/home/w-clue/howto-recordingmedia.com/public_html/wp-content/themes/cocoon-master/inc/single_top_ad.php' for inclusion (include_path='.:/opt/php-8.1.34/data/pear') in /home/w-clue/howto-recordingmedia.com/public_html/wp-content/themes/cocoon-child-master/functions.php on line 15
1.Thunderbirdをインストールしてみる
まずはThunderbird公式からダウンロードします。
「無料ダウンロード」を押せば簡単にダウロード可能ですよ。
ダウンロードが完了したら、インストーラーを開いていきましょう。開くとこんな感じです。
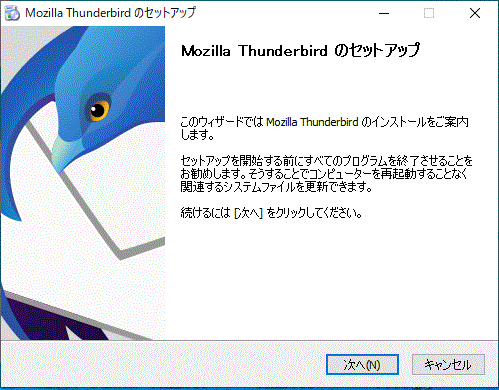
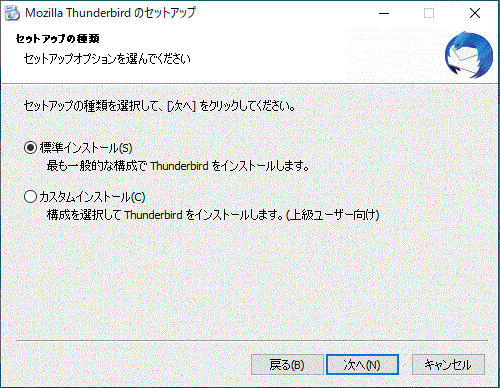
基本的には「標準インストールを」選びます。
次へを選択してThunderbirdをインストールする場所を決めていきます。
特別な事がなければデフォルトの場所で大丈夫ですし、規定のプラグラムとして使用する場合はチェックはそのままでOKです。
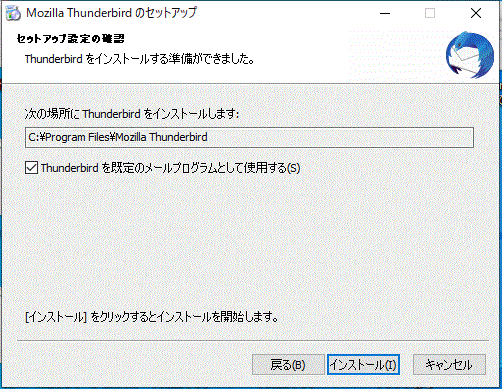
インストールする場所を決めればすぐにセットアップが完了します。
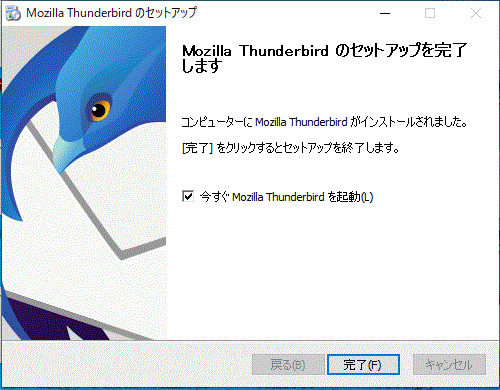
完了を押せばThunderbirdが起動します。
起動したら次はメールアドレスのセットアップを行っていきましょう。
今回は簡単に設定できるGmailを使用していきます。
Warning: include(/home/w-clue/howto-recordingmedia.com/public_html/wp-content/themes/cocoon-master/inc/single_middle_ad.php): Failed to open stream: No such file or directory in /home/w-clue/howto-recordingmedia.com/public_html/wp-content/themes/cocoon-child-master/functions.php on line 15
Warning: include(): Failed opening '/home/w-clue/howto-recordingmedia.com/public_html/wp-content/themes/cocoon-master/inc/single_middle_ad.php' for inclusion (include_path='.:/opt/php-8.1.34/data/pear') in /home/w-clue/howto-recordingmedia.com/public_html/wp-content/themes/cocoon-child-master/functions.php on line 15
・名前
・メールアドレス
・パスワード
項目はGmailで使用しているものを入力していきます。
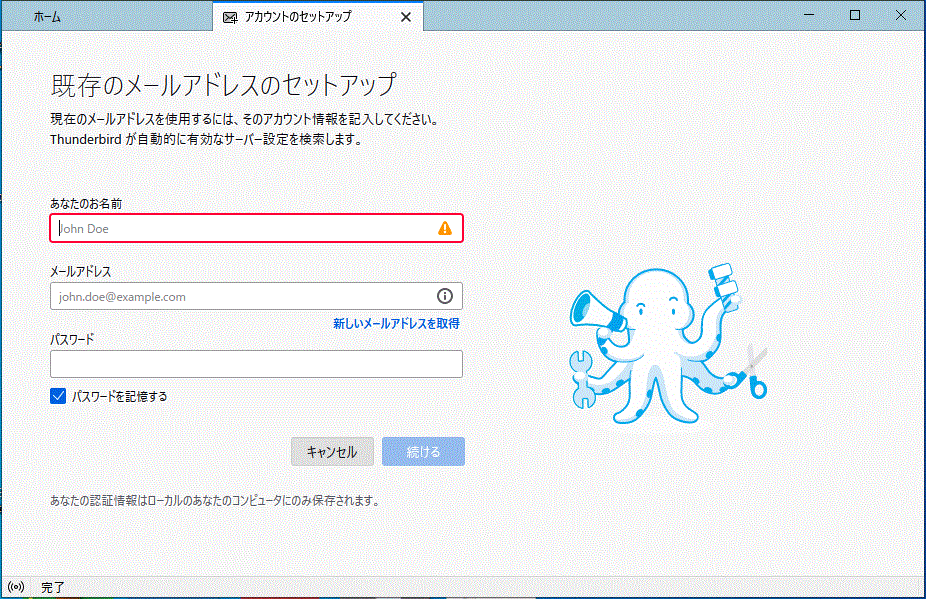
全ての入力が終われば「続ける」ボタンの色が変わるので押していきましょう。
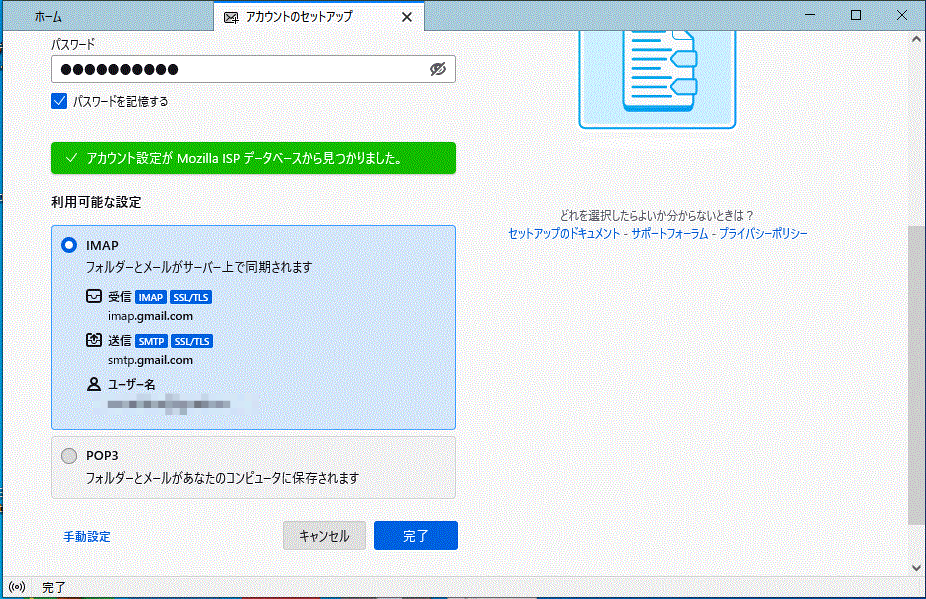
Gmailの場合は自動で設定してくれるので特に何か設定する必要はないので、パスワードなどが正しければセットアップは完了となります。
Googleのログイン画面などが表示されるので「許可」すれば下記画面になりますので、あとは同期を待ちましょう。

2.【仕事効率化】Thunderbirdをインストールして設定する方法とはまとめ
今回は仕事効率化を実現できるThunderbirdのインストール・設定方法を紹介していきましたがいかがでしたでしょうか。
Thunderbirdにはさらに仕事効率化できるアドオンなどもたくさんあります。
あとはニュースフィードなども設定できるので、普通のメールクライアントとは別の幅広い使用方法もできますよ。
おすすめアドオンなどは別の記事で紹介していきたいと思います。
以前紹介したThunderbirdを日本語化してメールの送受信を行いたいですが、アップデートを重ね、今は自動で日本語化してくれてるみたいです。最高(‘ω’)
今回も最後までお読みいただきありがとうございました。
Warning: include(/home/w-clue/howto-recordingmedia.com/public_html/wp-content/themes/cocoon-master/inc/single_under_ad.php): Failed to open stream: No such file or directory in /home/w-clue/howto-recordingmedia.com/public_html/wp-content/themes/cocoon-child-master/functions.php on line 15
Warning: include(): Failed opening '/home/w-clue/howto-recordingmedia.com/public_html/wp-content/themes/cocoon-master/inc/single_under_ad.php' for inclusion (include_path='.:/opt/php-8.1.34/data/pear') in /home/w-clue/howto-recordingmedia.com/public_html/wp-content/themes/cocoon-child-master/functions.php on line 15
コメント